

This Microsoft 365 offboarding checklist walks through the right order. Removing someone takes minutes — doing it in the right order is what protects the business.
It’s Friday afternoon and someone’s last day is wrapping up. The owner sends a quick message: “Can you take care of their Microsoft 365 account?”
It sounds routine, and it is. It’s also one of the easiest IT tasks to get wrong, in two opposite directions. Do too little, and a former employee keeps access to company email and files. Do too much, too soon, and the business loses mail and documents it still needs.
Below is the full list, in plain English, for a small business with no in-house IT team.
Why offboarding goes wrong
Three patterns come up again and again:
- Nobody owns it. The owner or HR knows someone is leaving, but whoever handles IT hears late, or not at all.
- Access gets left open “for now.” The account stays active, and “for now” quietly becomes months. Email is still forwarded somewhere, and the phone is still signed in.
- The account gets deleted on day one. Microsoft keeps a deleted user’s mailbox and OneDrive content for 30 days by default, so deletion can be undone for a while. That’s a safety net, though, and it shouldn’t be the plan.
Before the last day: decide who takes over
Spend ten minutes on three questions before touching anything:
- Who takes over their email? Clients will keep writing to that address.
- Who needs their files? Often the manager, but sometimes a team.
- What do they own? List the shared mailboxes, Teams, SharePoint sites, recurring meetings, and any vendor portals or subscriptions registered to their email address.
With those answers written down, the last-day steps are quick.
The Microsoft 365 offboarding checklist, in order
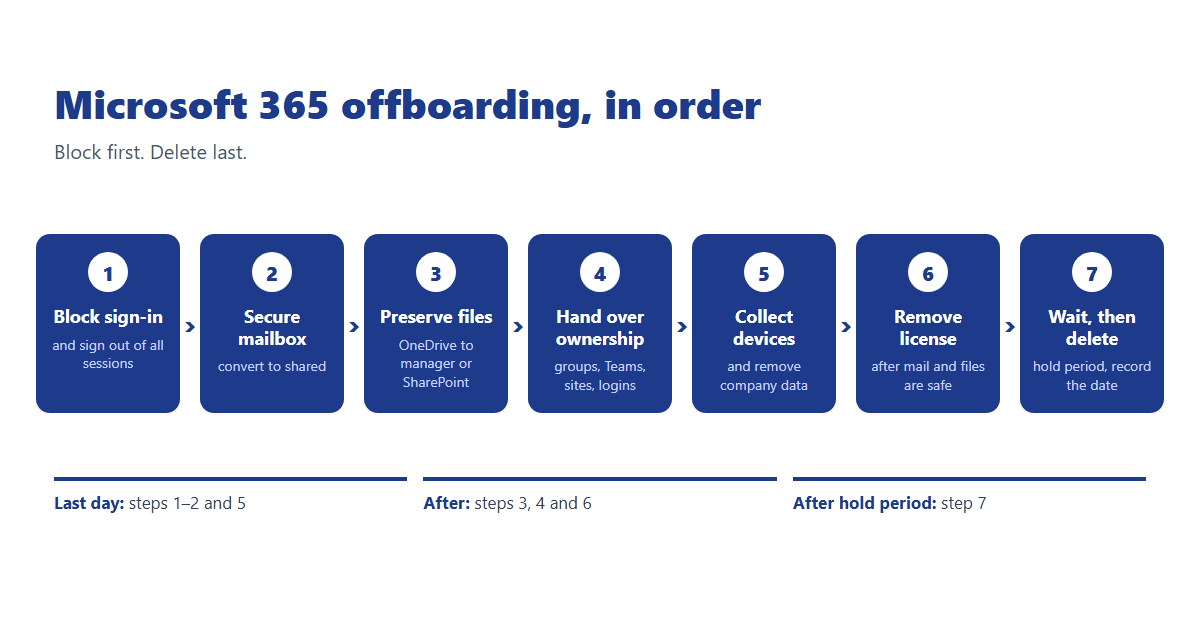
Step 1: Block sign-in and sign out of all sessions
In the Microsoft 365 admin center, block the user from signing in. Then also sign them out of all sessions. Blocking stops new logins. Signing out ends the ones already open on phones and browsers, which Microsoft says can take up to about an hour to fully apply, depending on how long the sign-in token lasts. Do both.
Step 2: Secure the mailbox
Convert it to a shared mailbox, so the address keeps working and someone can read and answer what comes in. Microsoft notes that a shared mailbox doesn’t need its own license, which also means you can stop paying for the old one. Check that the departing employee hasn’t set up any forwarding rules to outside addresses, and set an auto-reply if the role needs one.
Step 3: Preserve their files
Give their manager access to the OneDrive, or copy the business files into a shared location like SharePoint or Teams. Many small businesses have important documents sitting only in one person’s OneDrive, so this step is worth doing deliberately. Remember that Microsoft’s retention clock starts when the account is deleted, not when it’s blocked.
Step 4: Hand over what they owned
Reassign ownership of the groups, Teams, and SharePoint sites they managed. Move meetings they organized. Update any vendor logins, billing portals, or social media accounts that used their email address, so none of them are stuck behind a mailbox nobody can reach.
Step 5: Collect devices and remove company data
Get the laptop, phone, and any security keys back. If your devices are managed with Intune, you can remove company data from a personal phone or reset a company laptop remotely, rather than relying on someone to do it.
Step 6: Remove the license
Only after the mailbox is converted and the files are safe. This is where you stop paying for a seat nobody’s using, which is one of the quietest sources of Microsoft 365 waste.
Step 7: Wait, then delete
Keep the account blocked for a set holding period, such as 30 days, in case someone realizes they still need something. Then delete it, and write down the date. Deleting starts Microsoft’s 30-day recovery window, so don’t skip the written record.
Mistakes to avoid
- Only changing the password. It doesn’t end sessions that are already signed in.
- Deleting first and asking questions later. Block first, delete last.
- Forgetting everything outside Microsoft. Accounting software, CRMs, and social platforms often have separate logins.
- Leaving mail forwarding in place. Forwarding rules can keep sending company email to a personal address long after the person has left.
- Doing it from memory. A written checklist beats good intentions, especially on a busy Friday.
A Microsoft 365 offboarding checklist you can copy
Before the last day
- Decide who takes over email and files
- List what the person owns (groups, sites, meetings, vendor logins)
- Schedule the device handover
On the last day
- Block sign-in
- Sign out of all sessions
- Convert the mailbox to a shared mailbox
- Check for forwarding rules
- Collect devices
After
- Move or share their files
- Reassign groups, sites, and meetings
- Remove the license
- Hold the account for a set period, then delete it
- Record the date and what was done
When the departure isn’t friendly
Do Step 1 at the moment the conversation happens, not at the end of the day. Block sign-in and sign out of all sessions while the meeting is underway, then work through the rest of the Microsoft 365 offboarding checklist. Don’t delete anything. Think of it as a precaution that applies the same way to every departure, not an accusation.
How A2 SecureCloud helps
For our managed IT clients, offboarding is a ticket. We run the same Microsoft 365 offboarding checklist every time — access blocked, mailbox and files handled, devices accounted for, licenses cleaned up. You tell us the last day and who takes over, and we keep a record of what was done. You don’t have to remember the order, and nothing depends on whoever happens to be available that Friday.
If you’re not sure how your business handles this today, our free IT assessment is a good starting point.
Or email us at info@a2securecloud.ca.
A2 SecureCloud is a Canadian-owned managed IT and cybersecurity company serving small businesses across Canada, with on-site support in Durham Region, Ontario.
Pingback: Does Microsoft 365 Back Up Your Data? | A2 SecureCloud